
Adjusting Bit Rate on IP Cameras
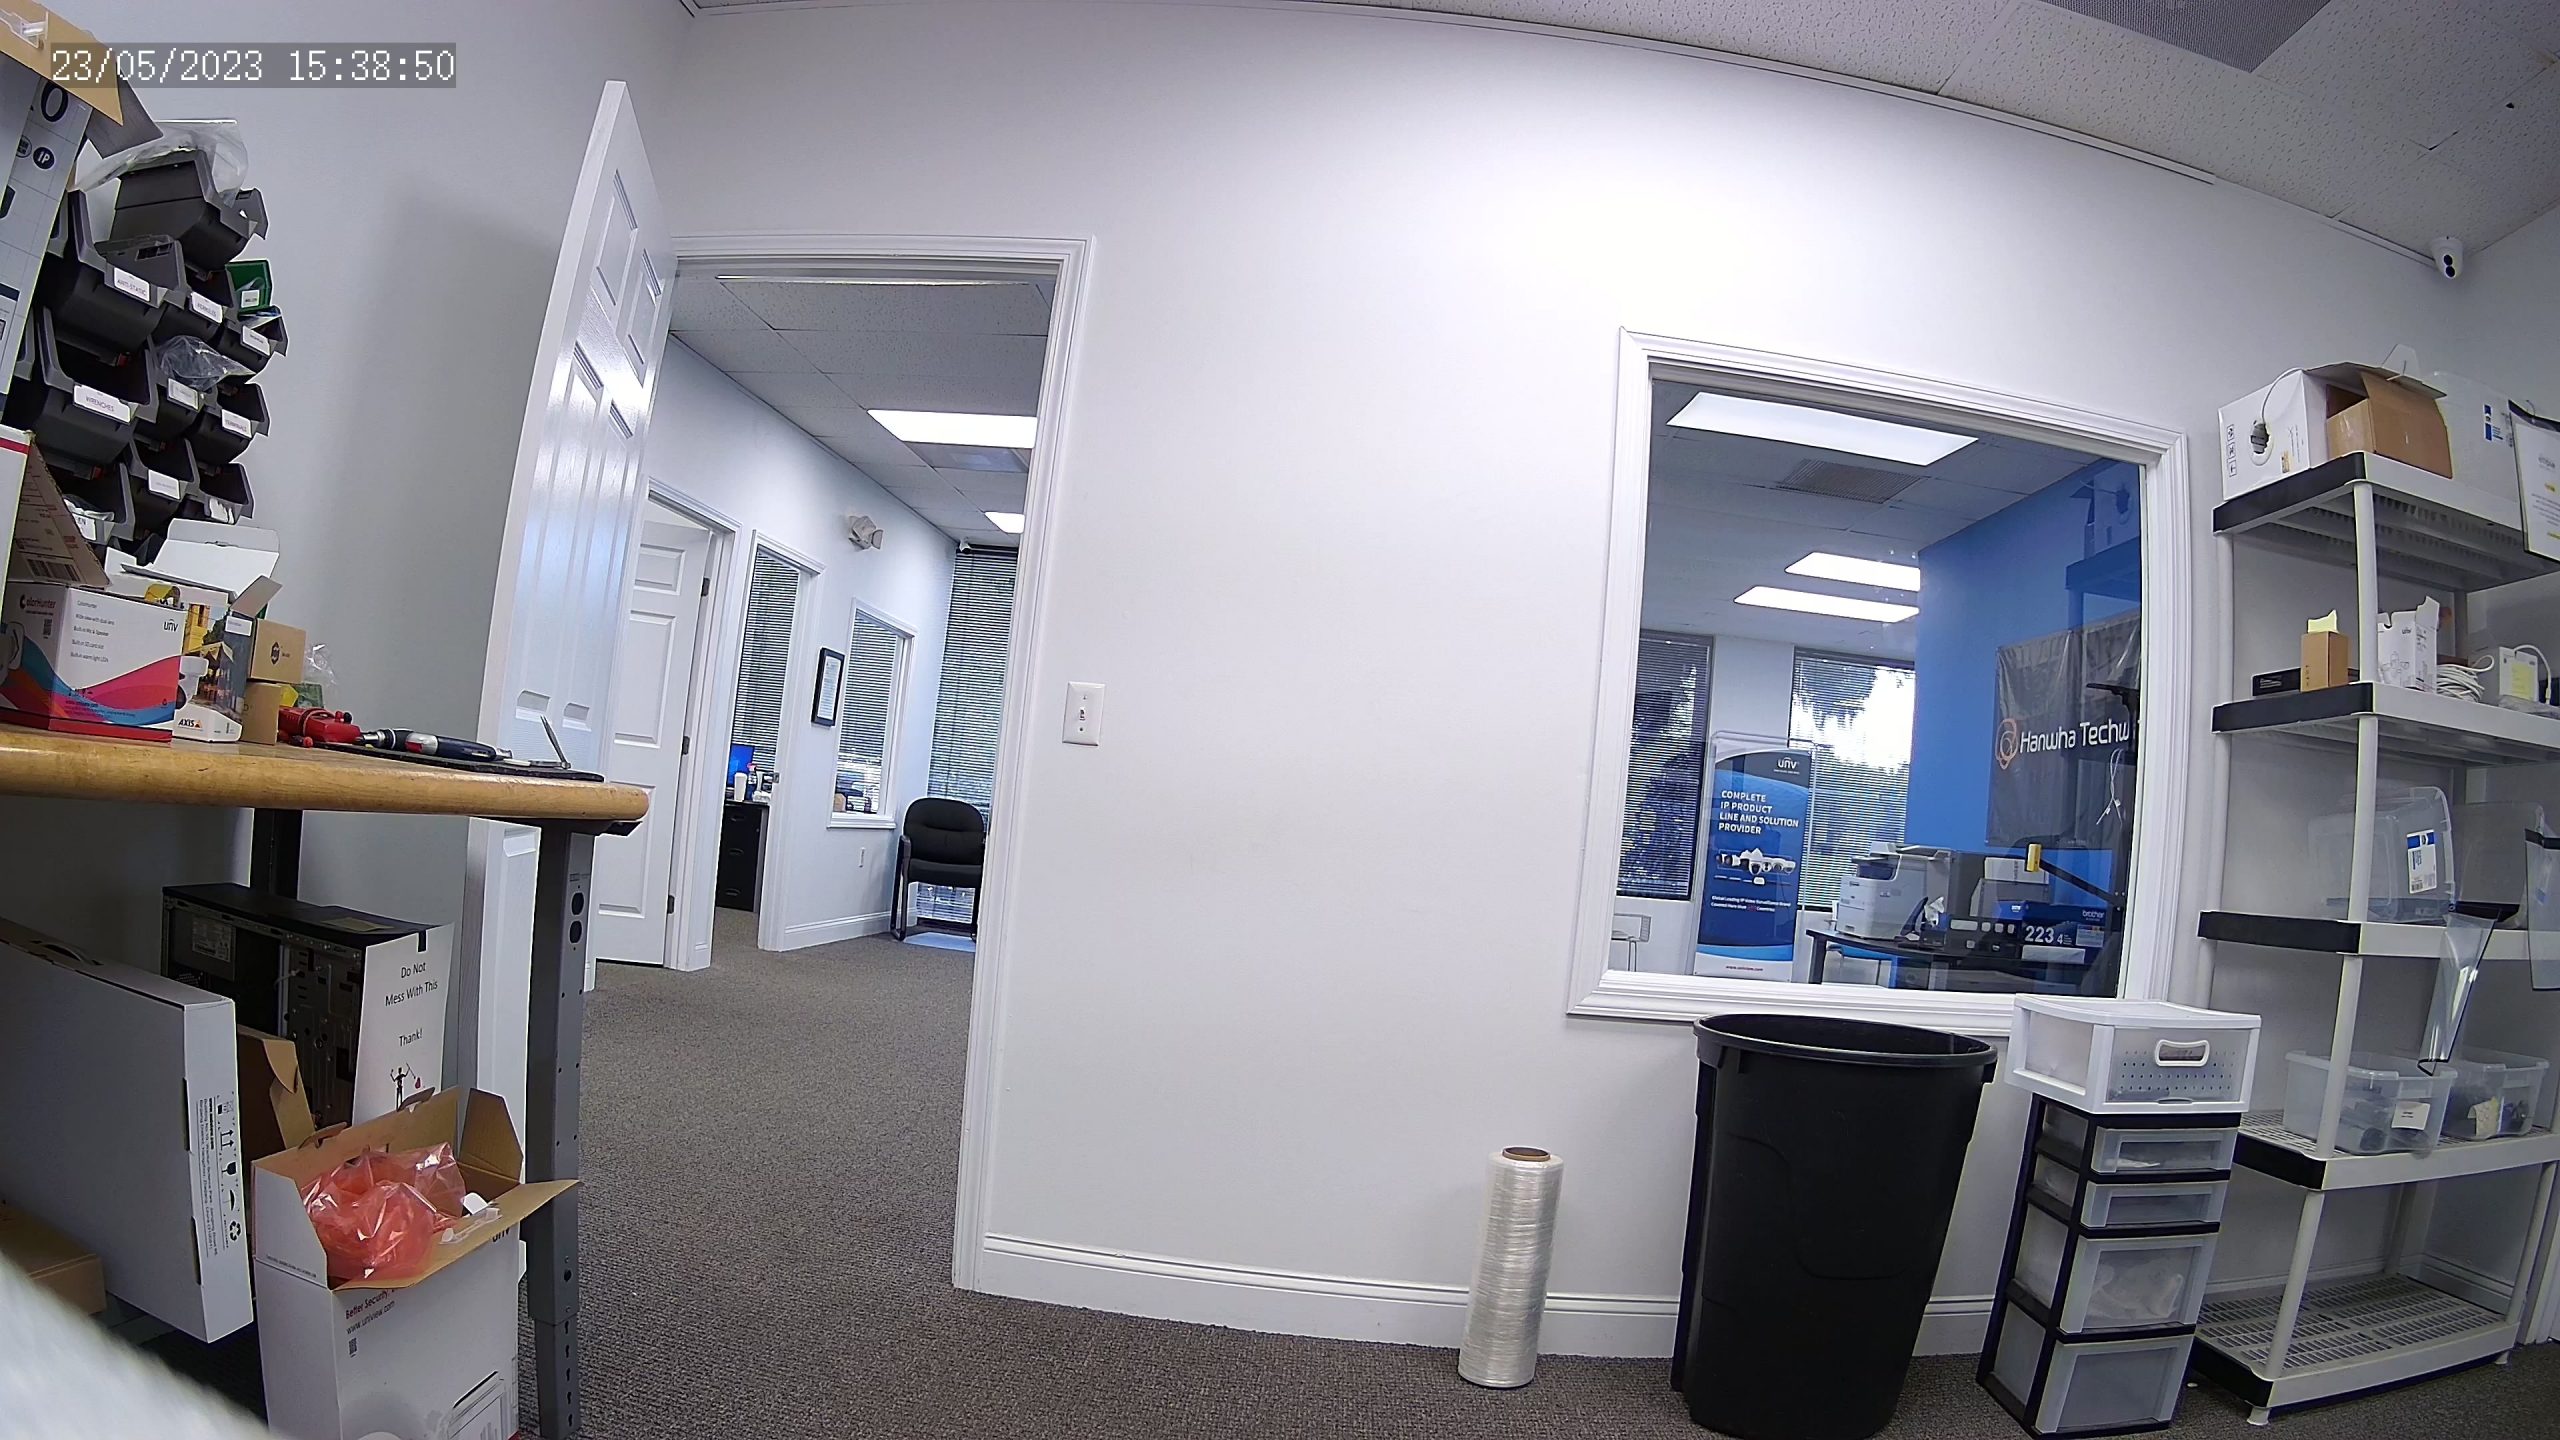
We were recently told by a few customers “I don’t want to adjust the bit rate on my cameras, because it’ll make them useless.” This got us thinking. Just how much does bitrate affect quality of a recorded video? We’re going to take a look at just that. To do this, we’ve set up two identical Uniview IPC2128SB-ADF28KMC-I0 4K cameras side-by-side and we’re going to see just how much adjusting the CCTV bit rate will affect playback quality.
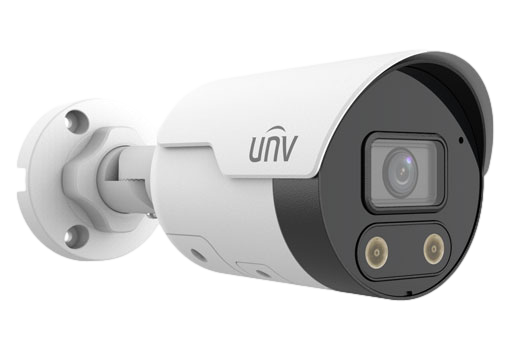
IPC2128SB-ADF28KMC-I0 Camera specs:
- High quality image with 8MP, 1/2.7″CMOS sensor
- 8MP (3840*2160)@20fps
- Ultra 265, H.265, H.264, MJPEG
- Smart intrusion prevention, include cross line, intrusion, enter area, leave area detection
- Based on target classification, smart intrusion significantly reduce false alarm caused by leaves, birds and lights etc., accurately focus on human and, motor vehicle and non-motor vehicle
- Intelligent People Flow Counting and Crowd Density Monitoring
- 120dB true WDR technology enables clear image in strong light scene
- Support 9:16 Corridor Mode
- Built-in Mic
- Built-in Speaker
- Smart IR, up to 30m (98ft) IR distance
Adjusting Bit Rate Test #1
The first run is going to be set like this:
Camera-A
- Resolution: 3840×2160
- Bit Rate: 8192kbps
- H.264
Camera-B
- Resolution: 3840×2160
- Bit Rate: 2048kbps
- H.264
We ran the cameras for an hour. Mostly because we forgot to stop the recording after the 15min we intended to use. Here are the results from the first run!
Camera A / Image 1
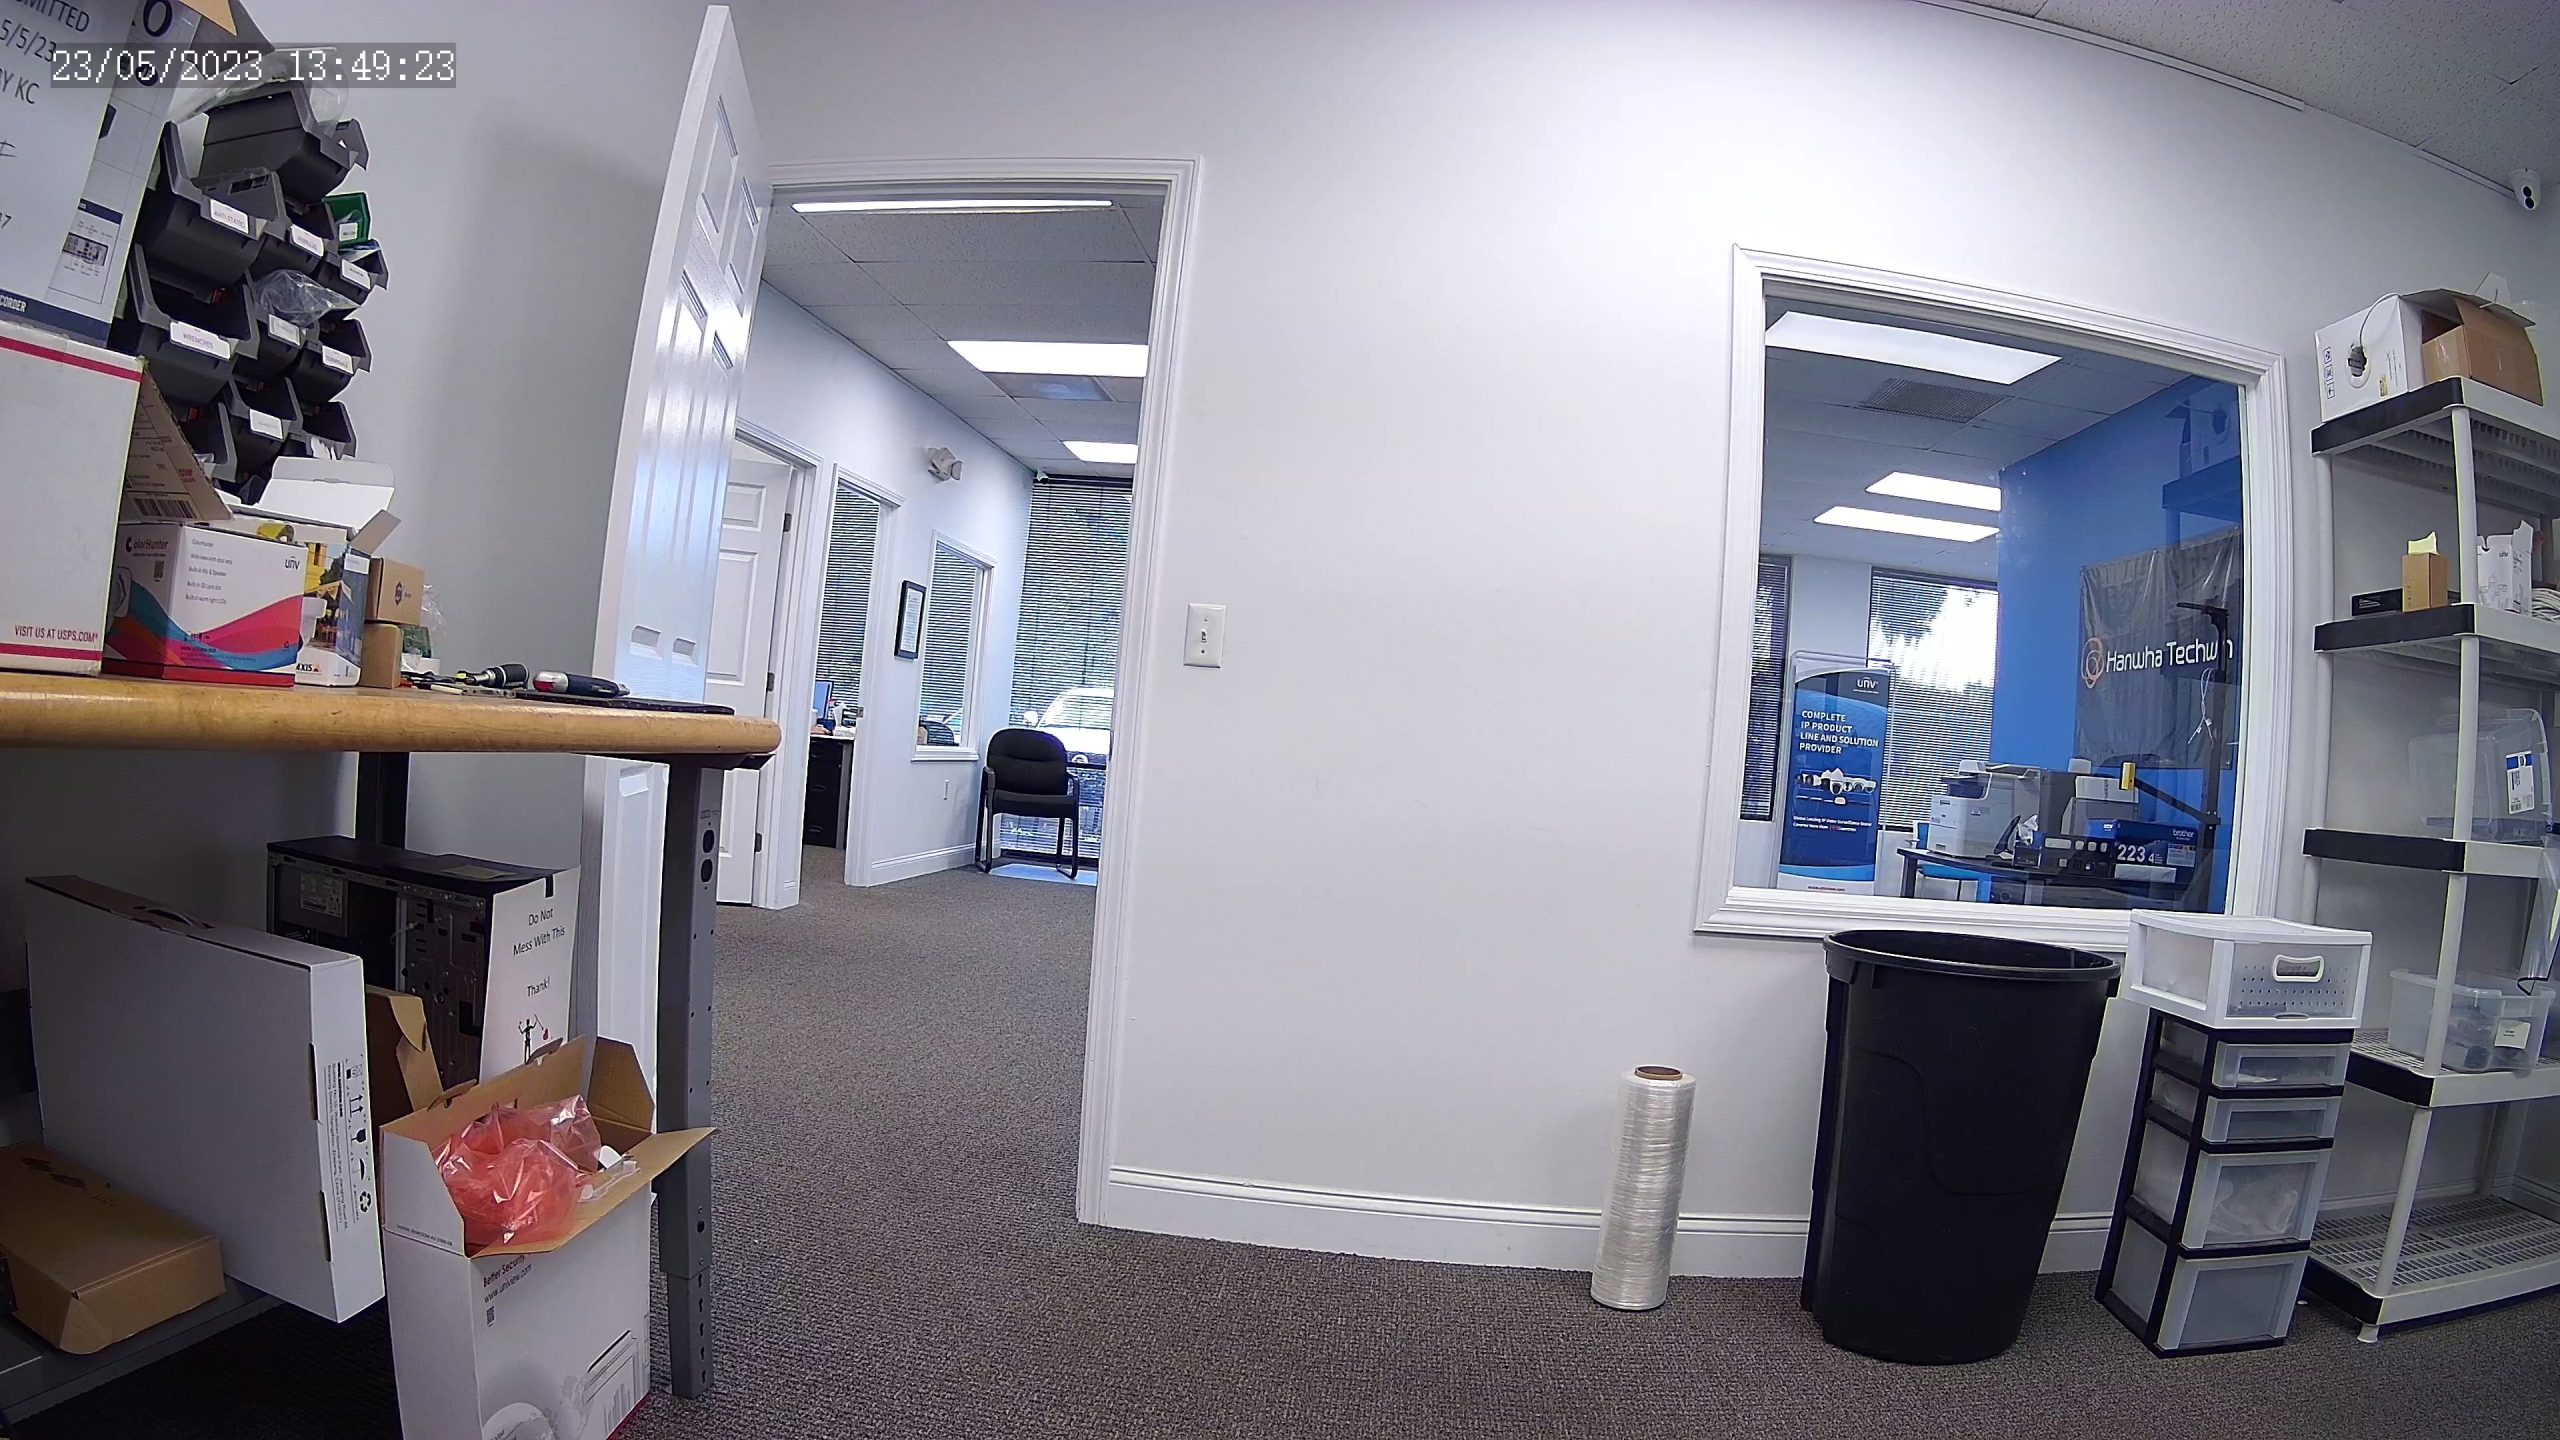
Click image to view full-size (3840×2160)
This is the full-scale image. Nothing has been adjusted with this camera. This is the way you would view it straight out of the box and connected to your NVR or via network connection.
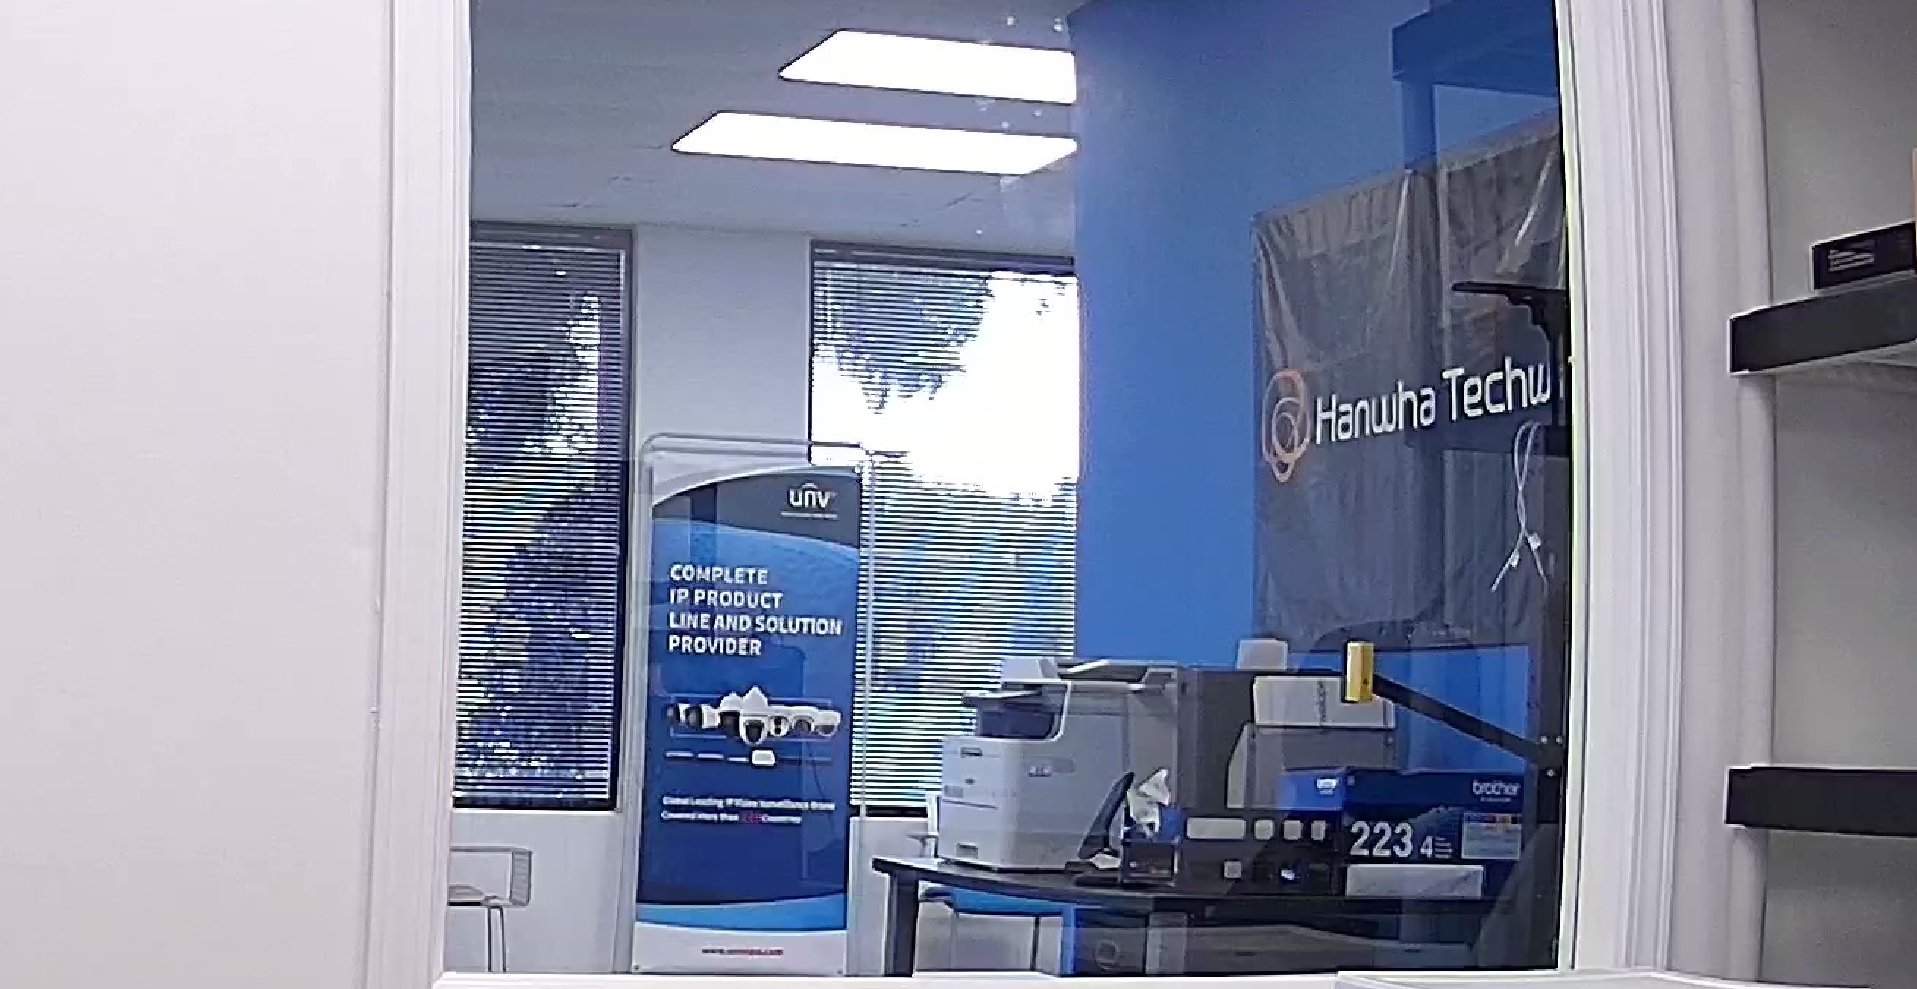
Camera A / Image 2

Click image to view full-size
The second image is zoomed in at 146%. Not bad. You can still read the sign in the background and there isn’t a ton of pixelation.
Camera B / Image 1

Click image to view full-size
Remember this camera was set to the same resolution, but the IP camera bit rate setting was lowered to 2048. So a quarter of Camera-A’s bit rate. When viewing the image full-screen, most people will not notice much, if any, difference.
Camera B / Image 2
Click image to view full-size
Again, not bad at all. Also zoomed in at 146%, even with the lower IP camera bit rate, you can still read the sign in the background.
Adjusting Bit-Rate Test 2
For our second run, we decided to lower the IP camera bit rate setting down to 1024kbps. The final result is pretty great.
Camera B / @1024 / Image 1
Click image to view full-size
At 1024kbps, you can still see great detail, still get a good, full image, and even read signs in the background from full-res. There’s a slight difference in video quality, but I’d be willing to bet that the majority of people won’t be able to tell the difference between Camera-A and Camera-B. Even cropped, you’d be hard pressed to tell a huge difference between the two. I’ve added Camera-A’s original cropped image again for direct comparison.
Camera B / @1024 / Image 2

Camera A / @Full
Click images to view full-size. Image on top is Camera-B @ 1024kbps. Bottom image is Camera-A @ 8192kbps
As you can see, the details are still readable at 146%, still not crazy pixelated, still perfectly serviceable. Now, granted, that’s with an 8MP camera. So, if you start splitting down the bit rate on a 1080p camera, your results may be quite different. We may actually need to give this test a shot with 2 and 4MP.
Affects to File Size
So how did the cut affect file size? Pretty drastically, as it turns out. The original run for Camera-A at 8192kbps weighed in a 333mb for a 6-minute clip, while Camera-B came in at 81mb for a 6-minute clip. The final clip at 1024kbps came in at around 31mb for a 4-minute clip. Adjusted to account for the time difference, it would be roughly 46.5mb. That’s about 461mb/hr. So, you can see how file sizes are reduced significantly.
Additional Considerations and Storage:
We’re not saying you should go slash your security camera bit rates. There are some subtle differences in the video quality that can’t be shown in stills. This is something we’re going to have a video on soon, so keep an eye on our YouTube (Link) channel for that. What we are saying is that if you or a client have a need to stretch drive space for a longer period of time, cutting your bit rate is a great way to do this. Using Uniview’s storage calculator we can see that on a system with 8 cameras running at 8MP resolution (20FPS) with 10TB of HDD space and no compression, we get about 13 days of storage.
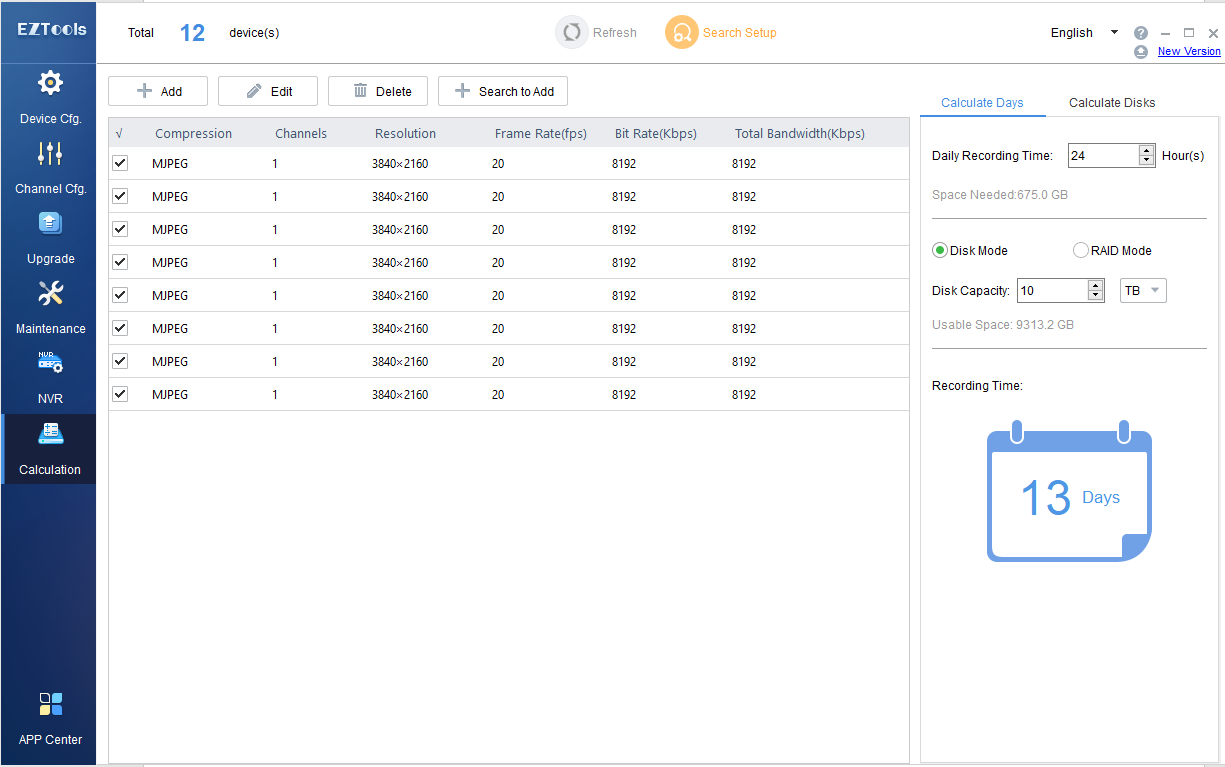
Click image to view full-size
And if we cut that in half (using H.264 or manually via the camera encoding) that space is obviously doubled, with no noticeable difference in video quality.
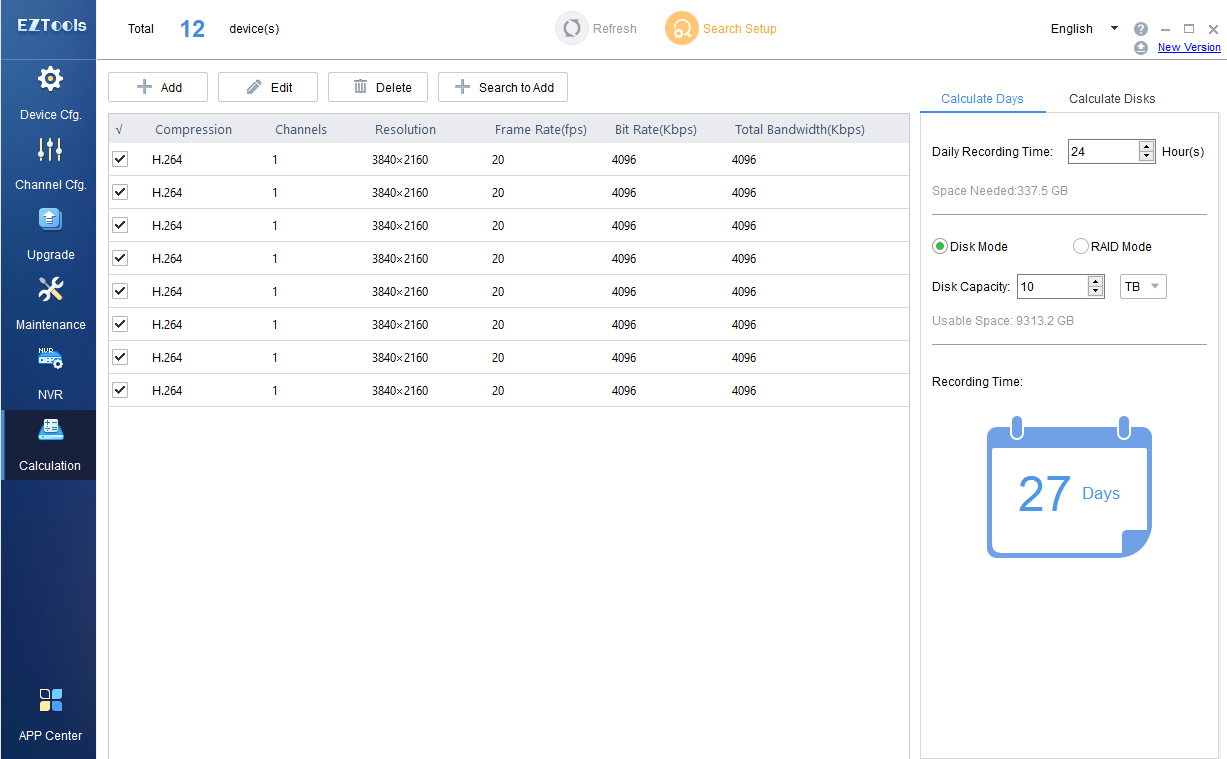
Click image to view full-size
Again, if you’re getting the storage you need and aren’t having any issues as far as resource management, then there’s no need to tweak your settings. However, if you’re in need of more storage space and don’t have it in the budget right now for a new HDD, this may be an easy fix until you can get that 14TB drive (or two) that you really want.
As always, if you have any questions about how to get this done on your Univew DVR or NVR, or any of the other systems we carry, please feel free to give us a call!
Camera Used in Testing:

View All UNV Products:

![]()
This article does a great job explaining how bit rate impacts video quality — it really helps you balance clarity with storage needs. A must?read for anyone setting up IP cameras